Managing Pay360 by Capita Module
February 07, 2024
Congratulations on choosing Pay360 by Capita! This guide walks you through installation, customization, and optimizing settings for a tailored payment experience.
|
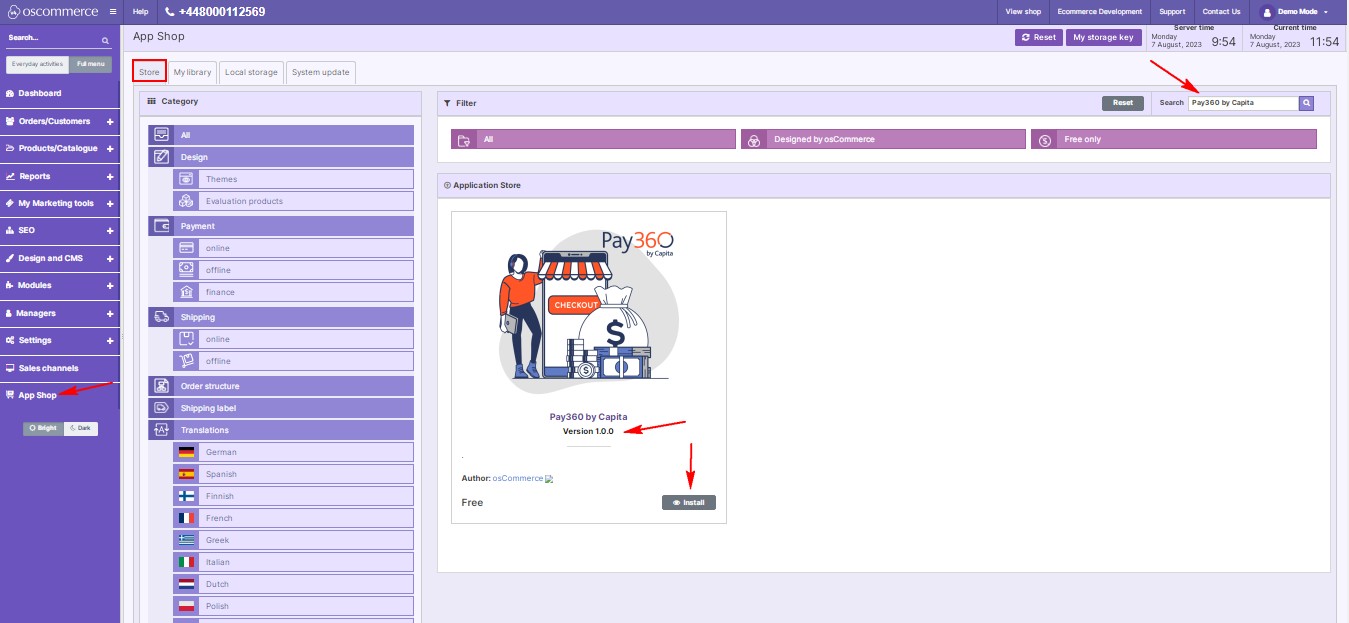
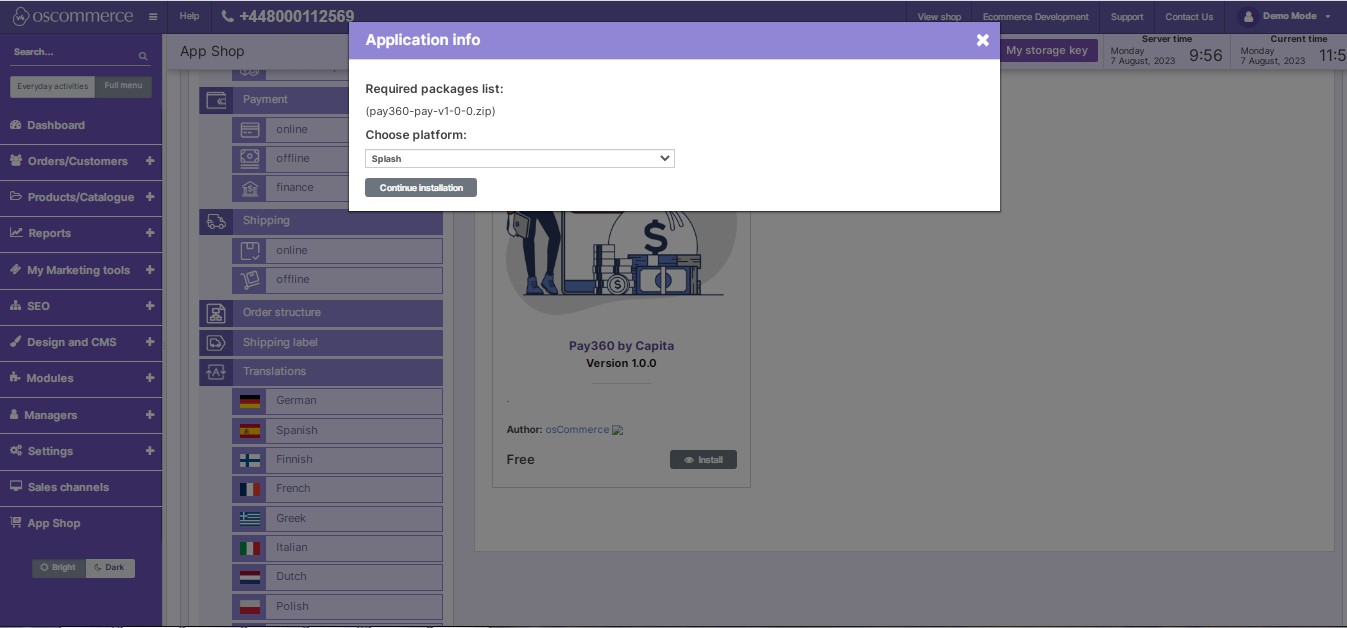
Step 1: Installation
- Access the admin area.
- Navigate to "App Shop" and "Store."
- Search and install Pay360 by Capita v1.0.0.
- Install the module on your website by following the on-screen prompts and instructions.
|
.jpg)
|
|
|
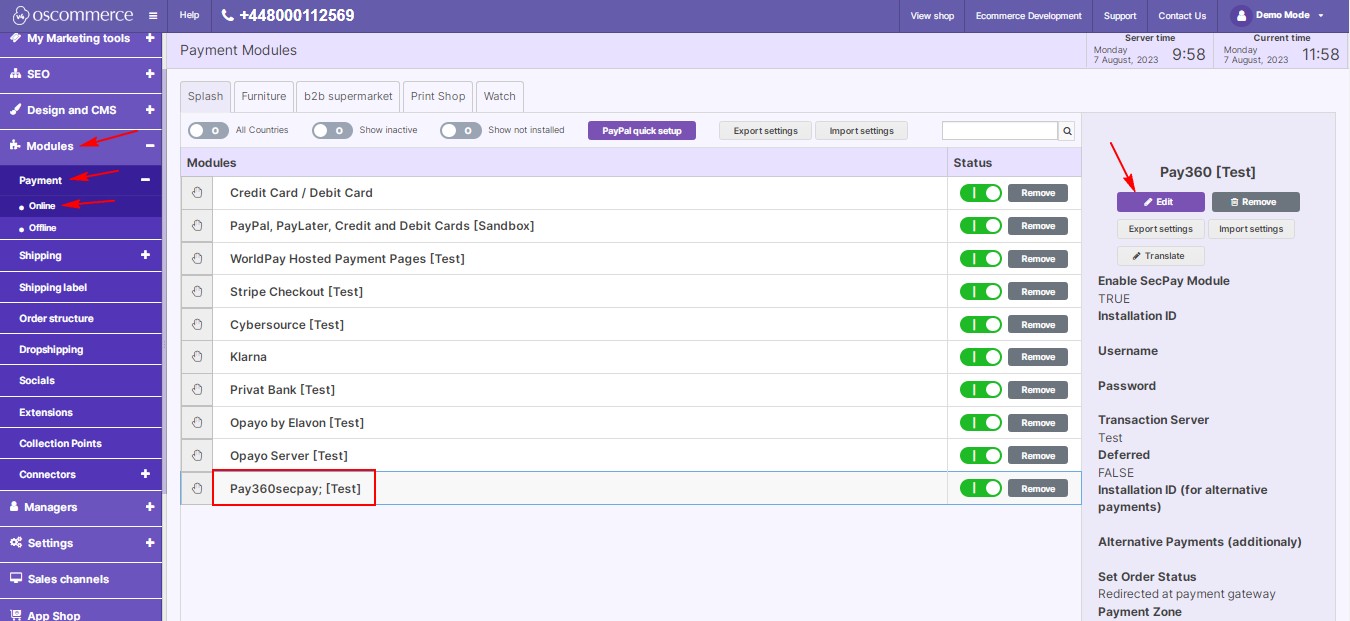
Step 2: Accessing Module Settings
- After installation, go to "Modules" > "Payment" > "Online."
- Find "Pay360," click "Edit" for settings.
|
|
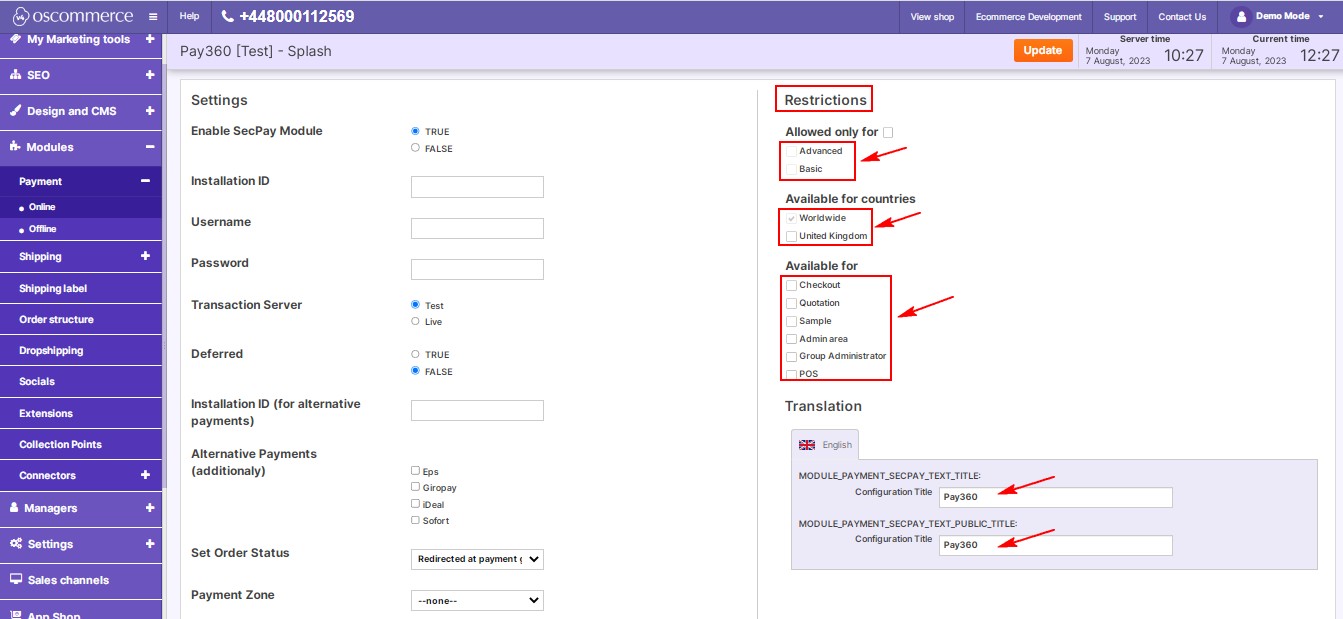
Step 3: Customizing the Pay360 by Capita Module
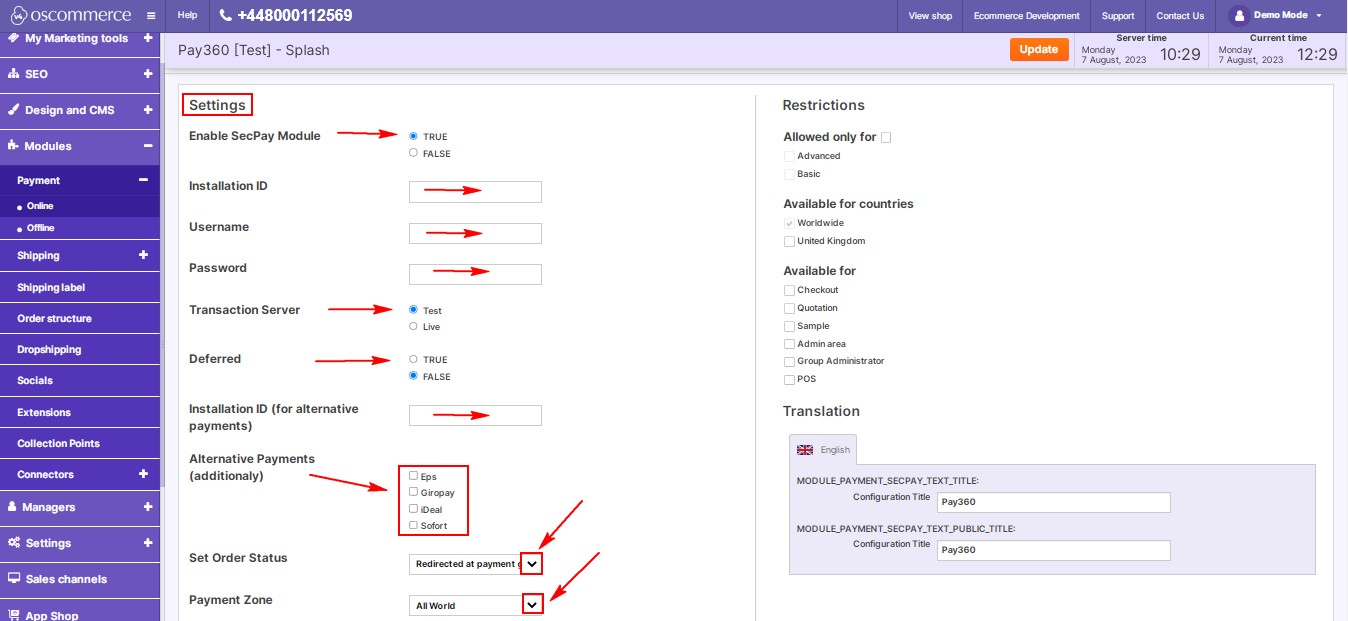
Restrictions:
- Tailor to needs: restrict to customer groups, countries, and pages.
- Specify module names in desired languages.
|
|
|
|
Settings:
- Toggle to enable Pay360.
- Enter installation ID, username, password.
- Enable test mode for test transactions.
- Deferred Payments: Enable for deferred payments.
- Alternative Payments: Enter installation ID for Eps, Giropay, iDeal, Sofort.
- Order Status: Set order statuses by selecting from the drop-down list.
- Payment Zone: Choose payment zone (All world, EU, USA).
|
|
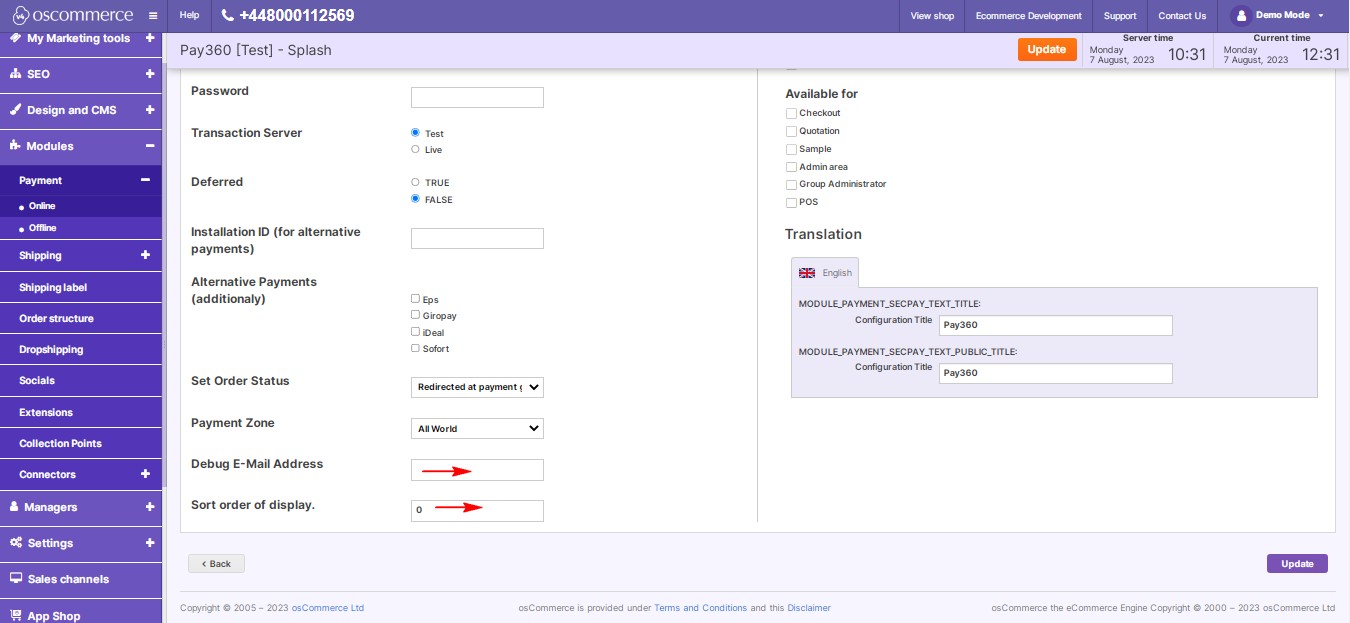
- Debugging: Enter debug e-mail for notifications.
- Payment Priority: Control display order during checkout. Lower values will prioritize Pay360 over other payment methods.
|
|
Keep your Pay360 module updated for secure transactions. Happy selling!


